

Concrete Step Repair follows a clear step-by-step process that helps restore worn-out cement stairs to their best state. Start by chiseling off any loose or crumbled concrete with a hammer and chisel or a masonry grinder until you reach the good part of the stairs. The next step is to clean the area to ensure there are no dust, dirt, oil, and grease. Afterward, spray water on the surface to prevent the old concrete from absorbing moisture from the new concrete patch.
Next, apply a concrete bonding agent or adhesive on the surface to act as an adhesive in sticking the patch. Mix your patching compound, whether a pre-made concrete patch or a mixture of Portland cement and sand, to create stiff but workable mortar. Trowel the patch over the repair area while overfilling it slightly. Then, shape it in line with the existing step using a trowel or a similar tool. Finally, allow curing slowly by keeping the surface damp for at least 24 to 48 hours through watering or wrapping it up using a plastic sheet.
Last but not least, for long-term protection, you can seal the Concrete Step Repair with concrete sealer after it is thoroughly dry to ensure it will be protected from further water and freeze-thaw damage.
What Is Upper Floor In Building Construction: Key Concepts, Materials, and Design Considerations
Concrete steps are one of the things found in many houses especially where there is a front stoop or porch. They give a strong and durable surface for walking and climbing. Besides being used for functional purposes, concrete steps are also used to beautify the front part of houses. However, concrete steps can also get damaged over time through chipping, cracking, crumbling, and breaking because of weather and improper installation. This could lead to a situation whereby concrete steps can no longer be used safely and effectively for their intended purpose.
Fortunately, there is no need to replace all the parts of the concrete steps that have been damaged. There are some simple procedures through which one can repair their concrete steps without necessarily doing the whole job from scratch. It is possible to repair them using some easily obtainable tools and materials from any home improvement store. Repairing concrete steps is relatively easy but it requires some skills and patience. In this blog post, we are going to give you some procedures on how to repair concrete steps that have been chipped and crumbling. We are going to give you the procedures in 10 simple steps. Let’s get started!
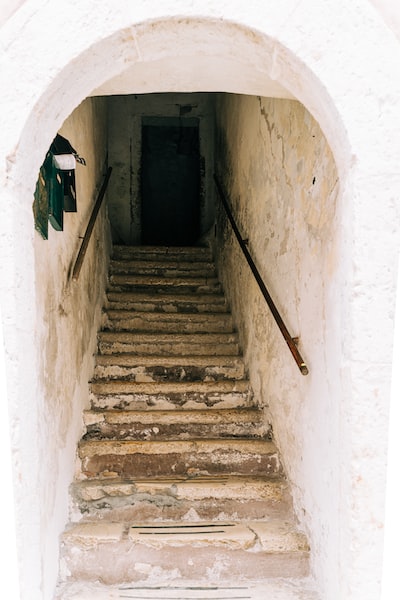

Step 1: Assess the extent of the damage
As the first thing to repair your concrete steps, you should analyze the degree of damage. You need to know how much concrete needs to be removed and replaced as well as which type of repair material to use. There are different types of repair materials including quick-setting cement, concrete patching compound, mortar mix, etc. The choice of repair materials depends on the location and the size of damage.
As a general rule, for the smallest and shallowest damage such as a crack or chip you can use quick-setting cement or concrete patching compound. These products are rather simple in their application and very fast-drying. But the bonding properties of such repair materials will not be too good and there is a high risk of shrinking and cracking.
For the larger and deeper damage like break or crumble you can use mortar or concrete mixes. Such repair materials are more durable and strong as compared with the previous options. Their bonding properties are better but their application and mixing are rather complicated and time-consuming processes.
You also need to consider the shape and location of the damage. If the damage is on the edges or corners of the steps, you may need to build a wood form to hold the repair material in place while it dries. If the damage is on the surface or near the center of the steps, you may not need a wood form.
Step 2: Remove the damaged concrete
Also, you have to take into account the location of the damaged concrete. If the damage is located on the edges or corners of the steps, it will be necessary to construct a wood form for holding the repair material in position during drying. If the damage is located on the surface or at the middle of the steps, no wood form will be needed.
Next step involves removing the damaged concrete from your steps. You should ensure that the surface where you will place new concrete will be smooth. In order to achieve this goal, you will need to have certain equipment, such as chisel, hammer, wire brush, drill, etc.
First, you will need to chip away all the loose and crumbling concrete in the damaged area using a chisel and hammer. In addition to this, you can use a drill with a masonry bit for creating holes in the damaged area.
Second, you should clean the damaged area using a wire brush. Alternatively, you can use a vacuum cleaner or blower.
Thirdly, use a chisel and hammer to rough up the surface of the damaged area in order for the new concrete to adhere well to the existing one.
Step 3: Build a wood form (if needed)
In the case that the damage is around the edges or corners of your steps, it might be necessary to create a wood form for the repair materials to dry within. Some materials needed include lumber, screws, duct tape, cooking oil spray, etc.
Firstly, take two pieces of lumber which are a little bit longer than the width of your step and then screw the two pieces together at a 90 degree angle creating an L-shaped structure.
Secondly, put the wood form in line with the damaged area of your step, in other words, make sure that the top of the wood form is aligned with the top of your step and then use duct tape to firmly stick it to the step.
Thirdly, spray some cooking oil spray onto the inner side of your wood form.
Step 4: Apply concrete bonding adhesive
Before you start applying any material for repairing, you have to put on the surface of the damage the concrete bonding adhesive. It is a liquid substance that provides a good connection between the old and new concrete. You can buy it at any hardware store.
In order to put it on, you will need some equipment, such as a paintbrush or a roller. You should carefully read the instructions on the packaging of the product to mix and apply it in the right way.
At first, you have to shake or stir the concrete bonding adhesive before you begin applying it.
At second, take the paintbrush or the roller and apply a good layer of the substance all over the damaged area.
At third, leave the adhesive for 15 minutes until it becomes tacky.
Step 5: Mix and apply the repair material
Now it is time to mix and apply the repair material to the damaged part. Depending on the type and size of the damages, various types of repair materials may be used, for example, fast-drying cement, concrete patching material, mortar mix, concrete mix, and others. Each of these repair materials requires certain mixing and applying techniques which should be followed.
In order to mix and apply the repair material, you will need the following tools and materials: a plastic bucket, water, a trowel, a margin trowel, etc.
At first, put some repair material into the plastic bucket and pour water into it according to the instructions written on the product label. Stir the mixture by means of a trowel until it becomes thick. Be careful to avoid putting too much or too little water because it will influence the quality of the repair.
At second, take some repair material from the bucket using a trowel or a margin trowel and put it into the damaged part. Press it hard to the wood form or an old concrete surface.
Third, you need to apply a trowel or margin trowel to ensure the surface of the repair substance is smooth. It should be level with the adjacent concrete or slightly higher than the latter. A wet sponge or a wet cloth may be used to clean any extra repair substance from your step.
Step 6: Sculpt and shape the repair material
When repairing an edge or a corner of your step, it becomes necessary for you to carve and mold your repair material according to the original shape of your step. For this purpose, some instruments are needed, such as trowel, margin trowel, sponge, etc.
In the first step, a trowel or margin trowel is used for cutting off the excess repair material which protrudes from your wooden form. A chisel and a hammer can also be used for chipping off the excess repair material.
Secondly, a trowel or margin trowel is used for shaping and curving the repair material to fit in the original shape of your step. Your fingers or a sponge can also be used for smoothing off the roughness of the repair material.
Thirdly, a sponge or damp cloth is used for wiping off the dust and debris from your repair material. A spray bottle can also be used for moistening your repair material to avoid its quick drying up.
Step 7: Remove the wood form (if used)
Once you have done the drying process, your wood form will be ready for removal, which can be done within 24 hours or once the repair material is fully dry. The following tools will come handy to help you in removing your wood form.
First, take off any duct tape that may be fastening your wood form to your step.
Secondly, use a hammer together with a chisel to remove your wood form from your step carefully so as not to damage your new concrete as well as your old concrete.
Thirdly, use either a wire brush or a vacuum cleaner to remove dust particles.
Step 8: Cure and seal the new concrete
Once you have fixed your concrete steps, then you should know how to cure and seal them. This way, they will be able to withstand any kind of weather and become more durable. To do that, you need to have some materials including water, concrete sealer, and many others.
In order to cure your newly fixed concrete, it needs to stay damp for at least 7 days. It is recommended to spray it with water using a spray bottle or cover it with plastic sheets and wet towels. In this way, your concrete will become strong and durable.
In order to seal your concrete, it needs to be treated with some concrete sealer after being cured for at least 7 days. Concrete sealers can be purchased in most home improvement stores. Make sure you follow the instructions on how to use it.
In order to apply the concrete sealer, you will need some tools including a brush or a roller. Apply an even layer of concrete sealer to your entire step. Wait for about 24 hours until you can use your step again.
Step 9: Paint or stain your concrete steps (stair) After fixing concrete steps.
If you want to improve the appearance of your concrete steps further, you can paint or stain them after they have cured and sealed properly. This will help them blend in with your house or garden or landscape. Here are some tips for painting or staining your concrete steps:
- Choose a paint or stain that is suitable for outdoor use and concrete surfaces. You can use acrylic, latex, epoxy, or polyurethane paint, or concrete stain.
- Clean the steps thoroughly and remove any dirt, dust, grease, or oil. You can use a pressure washer, a wire brush, or a degreaser.
- Apply a primer to the steps if you are using paint. This will help the paint adhere better and last longer. You can skip this step if you are using stain.
- Apply the paint or stain with a roller, brush, or sprayer. Follow the manufacturer’s instructions and apply thin, even coats. Let each coat dry completely before applying the next one.
- Apply a sealer to the steps after the paint or stain has cured. This will protect the surface from moisture, stains, and UV rays. You can use a water-based or solvent-based sealer.

Conclusion
In summary, repair of concrete steps through a DIY approach can be a rewarding task for those who are ready to put in extra effort. In order to achieve a successful outcome of repairing, one needs to adhere to the recommendations described above very carefully. First of all, one has to estimate the extent of damage – whether it is cracks or chipped concrete steps, broken edges and corners or voids in general. Chipped concrete steps can be easily fixed with a chisel and hammer while in case of more complicated cases involving contractors or precast concrete blocks can be essential.
There are a few steps to a successful repair. They include dust and excess concrete removal, application of concrete fortifier to increase adhesion and tapping of the new material to bond it properly. It will be also important to smoothen the surface in order to make it even with the surface of the tread and to be able to walk on it safely. Separated and lumpy areas have to be refaced too since otherwise it will contribute to the appearance of further damage. And, finally, it is very important to supervise the process of curing and to supply sufficient moisture.
In the end, whether you’re a seasoned DIY enthusiast or a homeowner looking to tackle home
repair, a well-executed concrete step repair can save you time and money while preserving the integrity and safety of your property.
FAQ
How can I repair concrete steps that have broken away from the house?
- A: You can repair concrete steps that have broken away from the house by using a product called concrete repair. This is a fast-setting cement that bonds to any concrete surface and fills in the gaps between the steps and the wall. You will need to clean the damaged area from debris, mix the concrete repair with water, and apply it to the joint with a trowel. You will also need to smooth out the surface and remove any excess concrete before it dries. For more details, you can watch this video.
How can I fix chipped concrete steps that crumble when I step on them?
- You can fix chipped concrete steps that crumble when you step on them by using a product called mortar. This is a mixture of sand, cement, and water that can be used to repair small cracks and chips in concrete. You will need to chisel out the loose material, clean the area with a wire brush, and wet the surface with water. Then, you will need to mix the mortar according to the instructions, and apply it to the chipped areas with a pointing trowel. You will also need to press the mortar firmly into the cracks and smooth out the edges. For more details, you can read this article.
How can I protect my concrete steps from further damage after repairing them?
- You can protect your concrete steps from further damage after repairing them by applying a product called sealer. This is a liquid that forms a protective coating over the concrete and prevents water, dirt, and stains from penetrating it. You will need to wait until the repaired concrete is completely dry, and then apply the sealer with a roller or a sprayer. You will also need to follow the manufacturer’s instructions on how many coats and how long to wait between them. For more details, you can check this guide.
What is the first step in repairing concrete steps?
- The first step in concrete step repair is to assess the damage. Look for chipped concrete steps, broken areas, or crumbling edges. This will help you determine the extent of the repair needed.
How do I prepare the damaged area for repair?
- To prepare the damaged area, start by removing debris and excess concrete. You may need to use a chisel and hammer to break away loose or crumbling concrete.
What materials do I need for concrete step repair?
- You’ll need cement or mortar to make the repair. Additionally, you may require a concrete surface sealer to protect the repaired area.
How do I apply a concrete fortifier for better adhesion?
- To enhance adhesion, apply a concrete fortifier to the damaged area before applying the repair material. Follow the manufacturer’s instructions for the correct application process.
Can I repair chipped concrete steps on my own?
- Yes, you can repair chipped concrete steps as a DIY project. Start by assessing the damage and follow the steps outlined for small repairs.
What should I do if the damaged area is still wet or has excess moisture?
- If the damaged area is still wet or has excess moisture, allow it to dry thoroughly before attempting the repair. Proper drying is essential for the repair material to bond effectively.
Is it necessary to seal the repaired concrete steps?
- Sealing the repaired concrete steps is recommended. A concrete surface sealer helps protect the repair and ensures its longevity.
How can I prevent concrete steps from chipping or breaking in the future?
- To prevent future damage, regularly inspect your concrete steps for any signs of wear or chipping. Address small issues promptly to avoid more extensive repairs later.
What are some important moments to consider during concrete step repair?
- Important moments during concrete step repair include proper preparation, application of fortifier for adhesion, smoothing the surface, and applying a sealer for protection.
Where can I find more information and resources for concrete repair projects?
– For more detailed guidance, you can refer to instructional videos, transcripts, and comments from experts and DIYers. Explore online resources and descriptions to help you with your concrete repair project.
Tags
6 thoughts on “The Ultimate Guide to Concrete Step Repair: Step-by-Step Instructions for Fixing Crumbling Cement Stairs.”